- Home
- Kids Party Ideas
- Party Food
- Chocolate Filled Cookie Cutters
Chocolate Filled Cookie Cutters
Chocolate Filled Cookie Cutters
Chocolate filled cookies cutters decorated with sprinkles are a wonderful gift for teachers or someone you would like to say thank you to! Give one to your mail carrier, baby sitter or other people that help care for your child. After the chocolate is gone...they have a cute Christmas Cookie Cutter! This takes a bit of gentle handling so it is best for an adult to make and children can help decorate.

Ingredients
- Metal Cookie Cutter
- White Chocolate or Brown Chocolate Bark. You could also use Toll House morsels.
- Sprinkles
- Spoon
- Chocolate Melter, Double Boiler Pot or Microwaveable bowl
- Cookie Tray
- Parchment Paper
- Clear Plastic Goodie Bag
- Colored twist ties, and ribbon to decorate
- Scissors
- Gift tags
Helpful Items
Steps
- Line cookie sheet with a piece of parchment paper about four inches bigger than your cookie cutter on all sides
- Place cookie cutter in center of piece of parchment paper, cutter side down.
- Melt 2 or 3 squares of chocolate bark per cutter.
- We recommend using a Stainless Steel Double Boiler Pot that we really like for melting chocolate. I purchased two different sizes and have found these are easy to use, easy to clean and I can put it in the dishwasher. They are sturdy and strong. However, if you are microwaving your chocolate, microwave for 30 seconds. Stir and repeat at 15 second intervals. Mix well after each heating. Do not over heat as chocolate scorches easily.
- Carefully pour melted chocolate into center of the cookie mold, making sure the cookie cutter does not move.
- Holding cutter down with fingers and putting a little pressure on it, gently shake the cutter side to side and the chocolate will spread into all corners. An adult should do this to prevent the chocolate from leaking out from under the cutter. If you have some cookie decorating tools, you could use these to help spread the chocolate evenly.
- Add more chocolate and repeat if necessary.
- Sprinkle with candy decorations or drop onto area you desire.
- Let cool and harden on the parchment paper.
- For faster results, cool in refrigerator for about 20 minutes. Do not store chocolate in the refrigerator. Store in a cool, dry place to avoid moisture from building up.
- Place in clear gift bag and tie with a colored gift tie and bow.
- Add a ribbon and gift card.

Tips and Suggestions
- When heating chocolate, stir well for at least 30 seconds to spread heat evenly. The hotter part will melt some of the chocolate as you stir.
- Very Important: Heat until just melted and chocolate is smooth and shiny. Chocolate scorches easily.
- After pouring chocolate into cutter, press down on cutter with fingers and gently slide the cutter back and forth to settle the chocolate. The parchment paper should move with your cutter.
Heart Shaped Chocolate Treats
Chocolate filled cookie cutters can be adapted to any holiday or occasion. We made chocolate hearts using heart shaped cookie cutters. We used the same method as above but gently pressed out the chocolate heart and bagged the chocolate hearts in a clear cello bag with a colored tie.
Tips and Suggestions
- We found the metal cookie cutters about 3" with simple shapes work the best.
- Do not get any water in your melted chocolate, this will ruin it.
- Using small candy molds you can make small chocolate favors in various shapes like hearts, stars, bears and more.
- Sprinkle your choice of candy decor into bottom of mold in a thin layer enough to form a heart shape on the bottom.
- Spoon just enough chocolate into mold. DO NOT PRESS. Lightly use knife to scrape excess.
- Chill for faster setting and gently pop out of mold, however do not store in the refrigerator or excess humidity will cause the chocolate to "sweat" and may make your sprinkles bleed color.
Chocolate Molds to Make Hearts and Stars
Chocolate Molds come in all types and are really easy to make. They are great for treats and favors. Use sprinkles to match your party theme. We found the crystals and the little rounds sprinkles worked the best. There are all a rainbow of colors you can select from making it easy to match your party colors.
Ingredients
- Colorful Crystals, round sprinkles, or small candies.
- Chocolate of your choice. We like Nestle Premium White Chocolate Morsels or Bakers Chocolate or Nestles Milk Chocolate Morsels
Materials
- Candy Molds (look in the party section at Walmart and Michaels or Amazon. Now they offer a lot of choices in silicone. We used the polycarbonate ones that are clear but the silicone molds are much easier to use. They are flexible and can be washed in the top rack of the dishwasher.
- Parchment paper
- Small Microwave Safe Bowl or small pot to double boil
- Spatula or wooden spoon to mix chocolate as it is melting
- Small spoon to fill molds with
Steps
- Melt your chocolate. We like the pot to double boil chocolate. You can also use a chocolate melter or in a microwave safe cup. Since microwaves vary, you will have to adjust the time to your microwave. Start with 30 seconds, stir well with wooden spoon, add 15 seconds as needed. Heat until just melted. Chocolate should be warm not hot. Chocolate scorches very easily and will taste burnt if heated too long.
- While chocolate is melting pour sprinkles into each mold cavity.
- Gently spoon some chocolate into each cavity until the mold is full. Tap side of mold gently to even out.
- Let set and harden. For quicker results and a harder coat, place in refrigerator for 30 min.
We filled the bottom of each candy mold with sprinkles, then poured the chocolate into each cavity.

Tips and Suggestions
- Fill your spoon with just enough chocolate to fill. It's easier to add more than to scrape excess with a butter knife. However if you do have excess, when you pop out the chocolate you can gently break it off with your fingers to make the shape stand out more.
- We found our molds at Michael's craft stores. We get several of the same pattern because they are great for craft projects too.
- We also tried the larger sprinkles but they didn't stand out as much. For some reason they got "lost" in the chocolate. White chocolate is definitely going to show your sprinkles more.
Recent Articles
-
Paint a Pet Rock
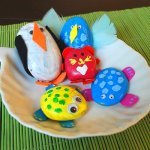 Paint your own Pet Rock
 -
Home Lunch Ideas for Kids
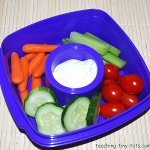 Home lunch and Snack Ideas for Kids
 -
Dirt Cake for Parties
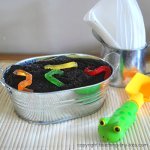 Dirt Cake for Parties
 -
Carnival Games for Kids
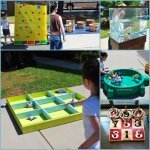 Carnival Games for Kids
![]()
Copyright© 2025 teaching-tiny-tots.com.