- Home
- Activities
- Stained Glass
Christmas Stained Glass
Description
A beautiful Christmas stained glass picture to display as Christmas decor. The colors look so vibrant with the foil reflecting the colors! Sharpies has so many pretty colors making this activity even more fun. We have provided some free printables for Christmas below but you could adapt this activity for any holiday and even a party activity for a make and take. We have done this Christmas stained glass with kindergarteners up to 4th graders. This can be done by very young children if it is prepared ahead of time and they are able to color gently. I used to do this project as a gift home to family from school.
Materials
- Design printed on white paper. See below for Christmas printables designs or find various free Christmas coloring printables online.
- Piece of thick cardboard or clip board to work on.
- Saran Wrap or name brand plastic wrap. Some of the other brands are a little thin and can tear easily when colored.
- 1 sheet of Foil per project.
- 2 Colored Plates per project (Black plates really bring out the colors)
- Fine Point (not Extra Fine) Sharpie Pens in various color (washable won't work)
- Scotch Tape or Masking Tape
- Packing Tape to Secure Project to Plate (frame)
- Clipboard or Piece of Cardboard to work on
- Ribbon to Hang Project
- Scissors
Steps
- Print out your picture of choice.
- Tape Selected picture to cardboard or clipboard and secure a piece of Saran Wrap over it with masking tape or scotch tape. Make sure the Saran Wrap is centered over the design. (See photo below)
- Using a black sharpie, trace all the lines of the design first.
- Use other sharpie colors to color the design.
- When you are finished coloring, take one of the plated and cut out the circle (center) of Most have a line you can follow. It should measure between 6.5-7" diameter. If you prefer, you could cut out circles from cardstock. If you are doing this as a class activity, having a stencil and cutting out circles ahead of time for each child is recommended.
- Tear a piece of foil large enough to cover entire circle and very gently, crinkle the foil and then open your piece of foil and lay flat. Foil should have small creases all over but no tears.
- Gently fold foil over cardboard circle, pulling it firmly but carefully so it retains a nice circular shape. It should hold in place but you can tape to secure.
- Work on a flat surface. Now take your completed colored Saran Wrap design and remove the pieces of tape holding it to your pattern but leave the tape on the saran wrap. You will use the tape to secure your design to the cardboard circle. Be very careful so as to keep it from folding up, and wrap gently but firmly over the foil covered circle. Use the tape to secure on the back.
- Now take this circle with your pattern on it and secure with packing tape to the inside of your second colored plate.
- If you want to hang this, make a hole punch at the top and tie ribbon.

Tips and Suggestions
- Washable colors will not work. I've found name brand sharpie pens which now come in many colors work the best.
- Remind your child to color lightly, don't scrub the saran wrap with the pen or it will tear.
- Leaving a few spaces blank without color has a neat effect too.
- I found that black plates really makes the colors stand out. Walmart, Dollar Tree and party supply stores have plates in various colors.
- Adjust the project to your child's age. This christmas stained glass activity can be done in Kindergarten but I have also done this with 4th graders. You can get a easier pattern for younger children and vice versa. For toddlers, trace the black lines for them, and have them color inside of the black lines.
Free Printable Christmas Stained Glass Patterns
Recent Articles
-
Paint a Pet Rock
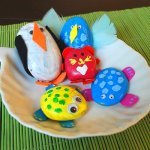 Paint your own Pet Rock
 -
Home Lunch Ideas for Kids
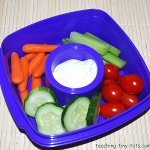 Home lunch and Snack Ideas for Kids
 -
Dirt Cake for Parties
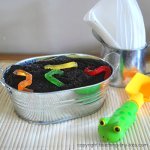 Dirt Cake for Parties
 -
Carnival Games for Kids
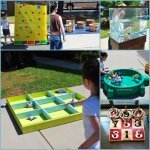 Carnival Games for Kids
![]()
Copyright© 2025 teaching-tiny-tots.com.