Pine Cone Potpourri
by Jodie (www.allgoodinmommyhood.com)
")
Pine Cone Potpourri Steps 1,2,3 (Glue,spices,glitter)


")
|

|

|
When I was attempting fence repair on Friday (not too shabby I might add), LLG brought me a new found treasure. A large pine cone.
When I was growing up we had a tree in our yard that produced gorgeous pine cones. I remember collecting them. Pine cones hold a special place in my heart.
So does ice cream, the 80's, Diet Coke, The Babysitters Club and my family. Quite an assortment.
Not only do pine cones immediately turn back the clock to my childhood, they also have so many crafting possibilities.
Before we settled on a craft. I took LLG on a small scavenger hunt to collect more pine cones. Once we had seven, we went inside to make a horrific mess in our kitchen.
I decided on potpourri because I had just had a bag in my hands at a store last Monday. Glittered pine cones with a heavenly wintry aroma. I contemplated what room they would go in, and if they were necessary. I knew I could make my own if I could find my own pine cones. I then stood in the aisle daydreaming about my childhood surrounded by pine cones, all the while annoying every shopper trying to squeeze by.
They must not weigh their $5.00 purchases quite as carefully. To each their own.
I set out newspaper and supplies. I grabbed cinnamon and nutmeg from my spice cabinet. LLG worked his magic and squeezed glue all over each pine cone.
LLG generously sprinkled the spices over each pine cone. He made sure to get an adequate amount on his chair and the floor.
Next, I had LLG squeeze more glue over each pine cone and he doused them with glitter.
While the pine cones dried, I went to gather a canister to place them in. I found a plain tin bucket, and red ribbon. I also grabbed some craft wire and small bells.
I had LLG set his easy on the nose potpourri in the tin bucket. I rearranged it because I can't leave anything alone. I tied red ribbon around the top and showed LLG our finished product.
We now have our 1st holiday house decoration. And it helps mask the smell of dog. Quite a bonus if you ask me.
With the extra pine cones, I decided to make a quick swag for my front door. I ran the craft wire through the top portion of each pine cone and strung a few bells. I twisted the craft wire to secure and ran the red ribbon through to hang my simple door decor.
Voila. Glittery, scented "Mommyhood Door Decor". Lovely.
I bet Martha Stewart will be knocking soon. On second thought, maybe not Regardless of my non-accredited crafting abilities, the craft was a success.
And the house smells of cinnamon and nutmeg. With a hint of dog.

More From TTT
-
Paint a Pet Rock
Mar 06, 25 11:39 AM
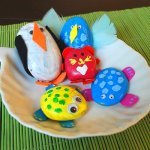 Paint your own Pet Rock
 -
Home Lunch Ideas for Kids
Feb 19, 25 03:47 PM
 Home lunch and Snack Ideas for Kids
 -
Dirt Cake for Parties
Feb 19, 25 03:18 PM
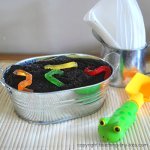 Dirt Cake for Parties


| Homepage | Return To Top |
| Contact Us | About Us | Sitemap | Privacy Policy |Disclaimer |
![]()
Copyright© 2008-2015 teaching-tiny-tots.com.