- Home
- Science Activities
- Celery Experiment
The Celery Experiment and How Plants Absorb Water from their Roots
Description
Toddler Science: A great way to introduce basic science concepts are through fun and visual experiments such as this Celery Experiment. It requires just a few items and is a fun way to teach children about how a plant absorbs water. This process is called Osmosis. We will learn about how plants absorb water using colored water and celery stalks.
Materials
Clear glass jars, cups or small clear vase
Fresh Celery stalks with leaves. Preferably the lighter leafier stalks near the center.
Water
Food Coloring
Steps
- Explain experiment. We are going to find out how plants absorb water and grow. See Educational note for more.
- Separate and select stalks of celery with leaves. Cut about a quarter inch off the bottom. The lighter stalks near the center will show the most color.
- Put about 8 ounces of water into glass jar or vase.
- Drop 3-4 drops of food coloring into jar.
- Place stalks into the water and using stalk stir very gently until food coloring is dispersed evenly.
- Have child/class make predictions about what will happen. Write it in a simple sentence and "point and read" together.
- Make 2-3 observations and write them down. Check at intervals depending on availability, you will see slight results after 3 hours, significant results overnight and again at 48 hours.
- Cut the bottom of the celery and you can see where the water was transported up into the celery stem.
Results
Day 2
This is the result after 24 hours. We added a few extra stalks so that we would have a selection to work with. The celery in the purple took in some color but interestingly enough the leaves withered and did not do well. I tried it again and the same thing happened so there may be something in the purple dye that the celery does not thrive from.
Day 3
This is the celery after 36 hours. The leaves are more vibrant, however starting to shrivel a bit. We removed the stalks that did not color as well for the photo.

Tips and Suggestions
If you plan to do only one color, consider selecting blue. We found blue to have the most vibrant results. The colors we tested were purple, red and blue, green and orange. The blue was significantly brighter. After trying this three times, we noted the blue water level goes down the quickest.
Use the lightest, innermost stalks for this experiment. The darker green did not show the colors as well and were less healthy in comparison with the lighter green stalks.
Be sure to trim the bottom of the stalks with a knife or shears (adult step). Examine the bottom after 24 hours to see where the water is being drawn up into the stem. Blue showed this the most clearly of all the colors.

Other Ideas
Sequencing Board

Celery Experiment Sequencing Book

Carnations
Sequencing Game
Educational Notes
Scientific Processes Used
Observation
Communication
Recent Articles
-
Paint a Pet Rock
 Paint your own Pet Rock
 -
Home Lunch Ideas for Kids
 Home lunch and Snack Ideas for Kids
 -
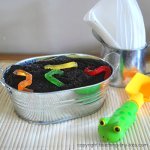
Dirt Cake for Parties
 Dirt Cake for Parties
 -
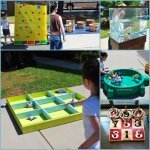
Carnival Games for Kids
 Carnival Games for Kids
![]()
Copyright© 2025 teaching-tiny-tots.com.