Easter Tree and Tissue Egg Ornaments
Description
Make this tree to hang Easter Ornaments.
Materials
- Potter, clay flower pot or cache' pot
- Shredded paper grass
- Green Tissue paper
- Masking Tape
- Newspaper
- Glue Gun
- Wrap three sheets of newspaper that are folded horizontally three times. Wrap around the end of the branch as tightly as possible and secure with several strips of masking tape.

- Place in the container and pack newspaper all around the sides. Secure the tree with masking tape to hold in a straight vertical position. Then criss cross the masking tape several more times for sturdiness.

- Make leaves by cutting strips of tissue 1 1/2 inches wide. Then cut into squares. These pieces of tissue do not have to be exact, you can estimate the size of a square.
- Fold the tissue so all corners are together then, pinch and roll the bottom between finger and thumb to form a point. This technique is more for adults. Your toddler may participate in this part of the tree and help make the leaves also. With a square of tissue, wad it up in a ball and it will look like a bud or small flower.

- Hot glue all the leaves or balls to the branches. (Adults ONLY)
- Place the paper grass around the base of the tree.

Tip
- Store your tree in a plastic bag and you will be able to use it for many years.
Tissue Easter Eggs
Description
Here is the steps to make the Tissue Eggs displayed on the Easter Tree.
Materials
- Elmer's Glue
- Paint Brush
- Small Jar
- Styrofoam eggs
- Tissue Paper: Solid or Printed
- Measuring Spoons
- Toothpicks
- Narrow Ribbons
- Needle with large eye
- Pliers
- 1 sheet of styrofoam 1 inch to 1.5 inches thick
Steps
- Place a toothpick at one end of a styrofoam egg and place it in the styrofoam sheet.
- Tear a color of tissue into about twenty 1" pieces. Paint top of egg with the glue mixture.

- With a medium loaded paint brush, pick up a piece of tissue and apply it to the wet area of egg, dab it until it is wet all over. Repeat until half of the egg is covered. Place toothpick in other end of egg. Set into styrofoam and finish applying the tissue.
- Allow to dry. This process can be made faster by using a blow dryer (Adult help) while waiting start another egg.
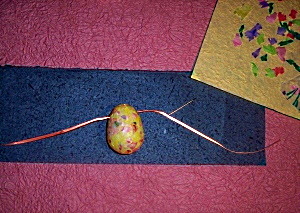
- When the first tissue egg is dry, apply small pieces of tissue in a variety of colors. When satisfied with the egg allow it to dry again. See photo.

- Thread needle with thin ribbon. Cut 12 inches long and at approximately 1 inch from top of the egg.
- Push the needle in one side of egg and out the other, using pliers to pull the needle out.

- Double knot on top of the egg and tie in a bow. Place in a bowl, basket or hang it on a tree for decoration. See Photo.
- Display in bowl, small basket or on the Easter Tree we made above.
Tips or Suggestions
- Technique for applying tissue without getting fingers sticky: Hold toothpick in one hand and paint brush in the other.
- Wrinkles in the tissue are good and add interest. Also where the tissue overlaps is good, for this reason solid eggs are just as pretty as spotted ones and no two eggs are ever alike
- Be careful with the toothpicks!
Recent Articles
-
Paint a Pet Rock
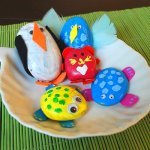 Paint your own Pet Rock
 -
Home Lunch Ideas for Kids
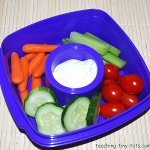 Home lunch and Snack Ideas for Kids
 -
Dirt Cake for Parties
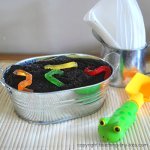 Dirt Cake for Parties
 -
Carnival Games for Kids
 Carnival Games for Kids
![]()
Copyright© 2025 teaching-tiny-tots.com.