- Home
- Activities
- Photo Frame
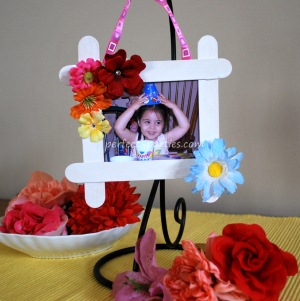
Easy Rhinestone Photo Frame
Description
Toddler Activities: Decorate a Frame with Rhinestones, buttons, flowers and paint.
Materials for Rhinestone Photo Frame

Craft Sticks (Jumbo, skinny, or colored)
Assorted flat back rhinestones, flat buttons, satin flowers, foam shapes, letter beads.
Paint (Ceramcoat or Acrylic) if you are using plain craft sticks.
Paint brushes
Craft Glue like Fabric-Tac
Parchment Paper to work on
Container for water
Ribbon to hang
Tape
Steps
- If you have a picture in mind already printed, lay the craft sticks on top to make sure it will fit the frame properly. You can lightly mark the sticks with a pencil.
- If you are using the same size picture for all the children, make a template of the shape. Lay a sheet of parchment paper on top and you can use that as a guide to gluing the sticks together.
- Glue crafts as shown in picture.
- Paint if desired. Let dry. Acrylic paint dries quickly, you will need 2 coats.
- Glue on rhinestones, buttons, foam shapes or whatever decorations you prefer. See our photos for some ideas.
- Let dry.
- Attach ribbon on back with craft glue.
- Attach photo using tape.
Tips and Suggestions
- Print out picture first and lay the jumbo sticks on top. Mark where you need to glue the sticks. Or if it is a class or group picture, make a template to lay the craft sticks on.
- Acrylic Paint or Ceramcoat works best. Paint 2-3 coats for best results. Ceramcoat is washable when wet and will dry permanent so use a smock or old t-shirt.
- Spray with Acrylic Spray for more shine. This will take extra time so plan to add the decor the following day for best results.
Simple Frame
Here is a very basic frame that works for a preschooler. You can make the center larger by simply moving the sticks out so that the ends make a square. Stick on foam, rhinestones are the easiest to work with.
Recent Articles
-
Paint a Pet Rock
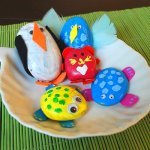 Paint your own Pet Rock
 -
Home Lunch Ideas for Kids
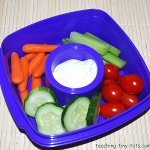 Home lunch and Snack Ideas for Kids
 -
Dirt Cake for Parties
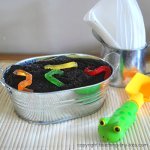 Dirt Cake for Parties
 -
Carnival Games for Kids
 Carnival Games for Kids
![]()
Copyright© 2025 teaching-tiny-tots.com.