- Home
- Activities
- Melt and Pour Soap
Melt and Pour Soap
Description
This is your most basic soap making technique. Perfect for toddlers. Just Melt and Pour!

Materials
- Clear Glycerin Soap (this can be found in crafts stores and on Amazon.
- Color Dyes ex.Essentials Soap Color Dyes 3 pack from Michaels or Craft Supply Store
- Scent Drops
- Plastic Soap Molds or even Candy Molds.
- Pyrex bowl or measuring cup
- Plastic spoons
Steps
- Remove soap from container. Cut only cubes needed.
- Place in Pyrex measuring cup or microwaveable container and microwave as directed.
- Add color or fragrance.
- Pour into mold.
- Let dry for 40 min to an hour, longer for larger soaps and pop out of mold by gently pressing back. You will see it separate from the mold.

Other Molds to Use with this Melt and Pour Method
Silicone Molds or Ice Trays
- Use any type of ice tray with cute shapes or a silicone mold. You can find them at Ikea, Dollar Stores, WalMart, Target and craft stores. Simply pour melted soap into the mold, let harden and pop out to create fun shaped soaps.

Stamping Letters
- Saw this idea on Martha Stewart. This method is too difficult for children to do independently, but the results are pretty. It would make a nice teacher gift they can help make. They can help by adding the color and scent and pressing letters into the soap.
Pour soap into a small flat tin. We used a small circle tin. When dry, use a butter knife to loosen edges and pop out the soap. Press metal cookie cutter with sharp
edge into the soap. Use a mini cutting board, small block of wood or other hard, flat object to help press cutter into the soap. Press soap shape out of the cutter.
Press stamps into soap. Display in soap dish or package as a gift.


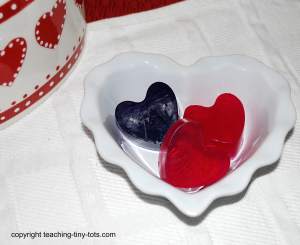
Tie Dye Soap
Fill mold with clear or opaque soap. Place one drop of color into the mold and stir slowly with a skewer or coffee stir to create a tie die effect.
Do not over stir.

Use Plastic Molds
You can use plastic molds to create 3-D shaped soaps. We used this plastic bunny container to make these cute soaps for Easter.

Tips and Suggestions
- Explain the activity to your child. With proper precautions and heating as directed, your child can assist in pouring into the molds. Again you know your child best and can determine what is safe for him or her.
- Melt just until cube is dissolved. Soap will be warm but fluid and your child can help pour into mold with your guidance. If it gets too thick, just microwave again for 5-10 secs depending on your microwave.
- A Pyrex measuring cup works well because it has a handle to hold that doesn't get hot and it has a spout to guide soap into mold. It's soap so it washes clean easily.
- To create a layered effect, pour clear soap into mold. Put one drop of color. Mix with a coffee stir. Let set while you add a drop of a second color directly into your melting container. Mix and pour into same mold after 5-10 minutes.
Recent Articles
-
Paint a Pet Rock
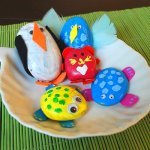 Paint your own Pet Rock
 -
Home Lunch Ideas for Kids
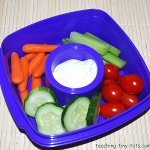 Home lunch and Snack Ideas for Kids
 -
Dirt Cake for Parties
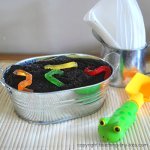 Dirt Cake for Parties
 -
Carnival Games for Kids
 Carnival Games for Kids
![]()
Copyright© 2025 teaching-tiny-tots.com.